
How to Hide Disk Drive Using Command Prompt
Step 1:
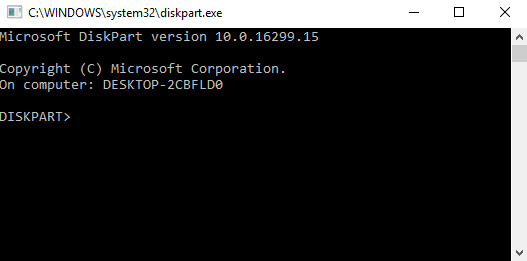
Press “Windows + R” and type “DISKPART”. It will open Diskpart utility.
Step 2:
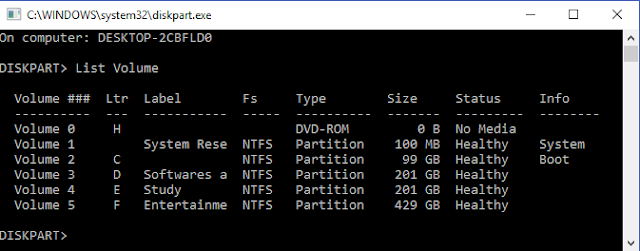
Now type “LIST VOLUME” in the diskpart and press enter. It will show you all the drives in your computer with their corresponding Drive Letters.
Step 3:
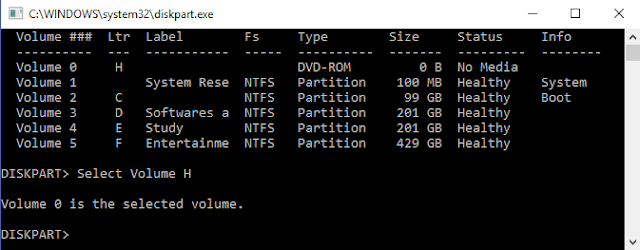
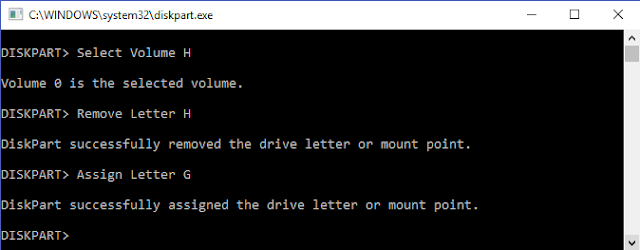
Type “SELECT VOLUME drive letter”(Type the drive letter which you want to hide). It will show you that the Drive Volume with the corresponding number is selected.
Step 4:
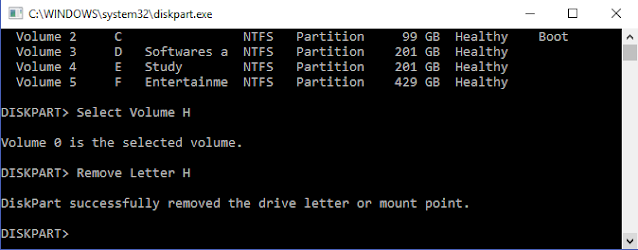
Next type “REMOVE LETTER drive letter”(Type the drive letter which you want to hide) and hit enter. Now go to My Computer and check. The Selected Drive is no longer visible in My Computer.

Unhiding the Disk Drives
In order to unhide the drive again, do the first three steps again, and in the fourth step just type “ASSIGN LETTER letter of Drive” instead of REMOVE LETTER. It will show you your drive again. You can also use the same method to change the drive letter of any drive. However, you cannot use Drive Letter A and B as Drive Letter A and B are reserved Drive Letters for floppy disks.

Also, Check
How to remove junk files from your computer.
If you like this trick then share it with your friends on social media. Also, Follow us on Facebook, Twitter, LinkedIn, Google Plus, and Subscribe our YouTube Channel. Subscribe our Newsletter so that you will get all the latest updates directly in your inbox.