Do you want to accept payments online on your WordPress Website? or are you looking for a solution to integrate a payment form into your website?
In this article, we will help you to accept payments
online on your WordPress website by creating a payment form and integrate it
with the Authorize.net payment gateway. So, let's get started.
Authorize.net Payment Gateway
Authorize.net is one of the best and secure payment
gateways that allow merchants to accept payments on their websites.
So, the first step is to sign up for the Authorize.net
Payment Gateway services. You need to sign up with your business details. Once
your application is approved, then you can start accepting payments online on
your website.
The next step is the integration of the Authorize.net
Payment gateway with your WordPress website. For that, we are going to use the wpforms
WordPress plugin.
wpforms WordPress Plugin
wpforms is one of the best drag and drop form builder
plugins. With the help of the wpforms plugin, you can easily create forms in
your WordPress website just by drag and drop. You can easily create contact
forms, feedback forms, registration forms, payment forms, online surveys, email
opt-in forms, multi-page and multi-step forms, etc
wpforms has many addons for different integrations and to
add different functionality to the forms. For example, It supports all the
latest email marketing platforms like Mailchimp, Getresponse, Aweber,
Sendinblue, etc to integrate with wpforms.
wpforms also offers an Authorize.net addon that makes
life easy and you can easily connect your Authorize.net payment gateway with
your WordPress website.
Steps to setup a payment form with wpforms
Here are the steps to create a payment form and integrate
it with the Authorize.net payment gateway.
Step1.
Install & Activate wpforms WordPress plugin
First, you need to install the wpforms WordPressplugin.
Once you activate the plugin. The next step is to install
and activate the Authorize.net addon for wpforms. For that, Go to addon in
wpforms and select Authorize.net. Authorize.net addon is available in the elite
plan, so make sure you have the elite plan.
Step3.
Get API Login ID and Transaction key
Now you need to connect your Authorize.net account with
your WordPress website. For that, you need an API Login ID and Transaction key.
Sign
in to your Authorize.Net Account
First, get API Key and transaction key from Authorize.net
that you need to add to the WPForms payment settings.
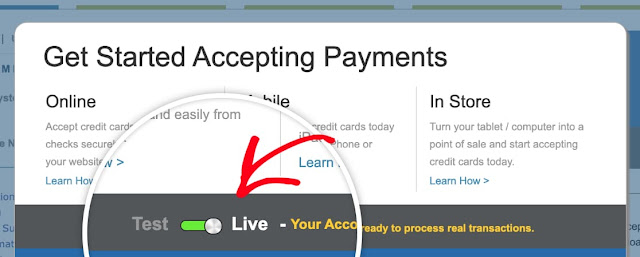
Sign in to your Authorize.Net account. Once you log in to
your Authorize.net account, you will see a prompt to set your account on test
or live mode. Set your account to live mode.
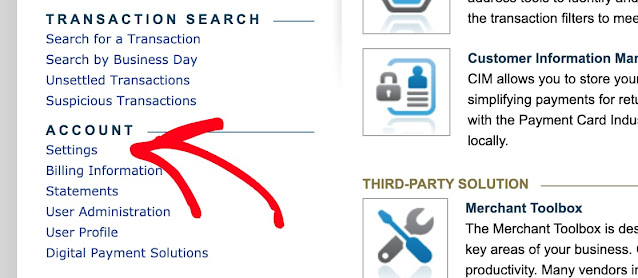
Go to settings in your Authorize.net account.
API Key
Go to API Credentials and Keys on the settings
page.
Transaction
Key
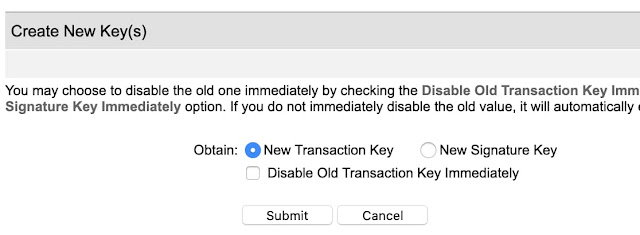
Now look for the section that says Create new keys. In create new keys section, select the New Transaction key and click submit.
After that, you will see a popup message to verify your identity. You'll also see your email address there. To complete your identity verification, click request pin button.
After that, you'll get a pin in your email. Enter the PIN
and press the verify PIN button. After you confirm your identity, you'll get a
Transaction key. Make a note of this Transaction key.
Step 4.
Enter collected keys in payment settings of wpforms plugin
Now you got API Login ID and Transaction Key. You need to
enter these in wpforms payment settings.
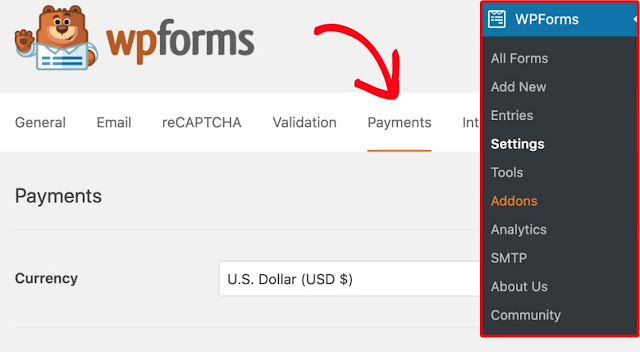
In wpforms, go to the payments tab and scroll down to Authorize.net. Enter these values in their respective fields and click save settings.
Step 5.
Create Payment Forms
As your Authorize.net account connects with your
WordPress site. Now, you can create Authorize.net enabled payment forms for
your WordPress website.
You need at least four fields in your form to accept
payment with Authorize.net
1. Name
2. Email
3. Items
field for your products and services
4. Authorize.Net
field to collect credit card details.
Now enable the Authorize.net Payments to start accepting payments from your created form.
In the same settings, you can also set other options like
payment description, customer name, and email for payment receipts, etc.
Now you're all set with the payment form. You can now use
this payment form in any WordPress posts or pages and start accepting
payments.
I hope this article help you to understand how to accept
payments online from your wordPress Website by creating a payment form and
integrate it with payment gateway(Authorize.net).
If you need any help regarding the same, you can mention
in the comment section.
Also, don’t forget to follow us on social media and
subscribe to our newsletter.


Post a Comment